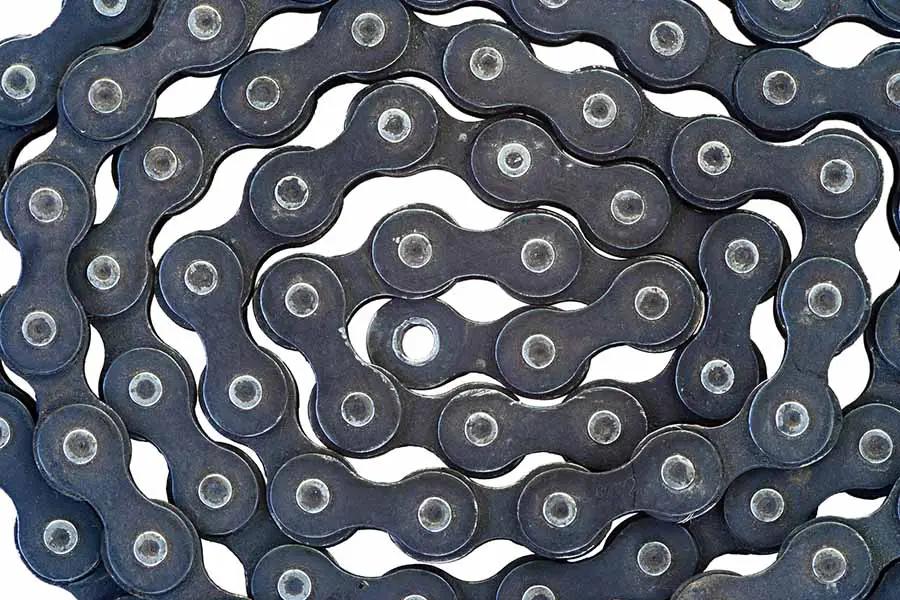
As someone who rides quite a bit, I know that it’s a very common thing for a chain to wear out. After miles & miles of riding the pins will “stretch” causing the overall length of the chain to increase. With that in mind, I thought I’d write this helpful article about whether a bike chain can stretch.
So, can a bike chain stretch? A bike chain will stretch over time as you ride. It usually is not noticeable so it should be measured regularly. This is because a stretched chain will begin to wear out the cassette very fast. A cassette is much more costly to replace than a chain so it is better to replace the chain by catching it early.
Now, to see if your chain is stretched, you have to measure it. Measuring a chain yourself can be a bit tricky if you haven’t done it before. So, below I’ll explain how to measure a chain to see if it has stretched, how to replace a stretched chain, and how long a chain should last.
How do you know if your bike chain is stretched (stretched chain symptoms)
Symptoms:
- The chain slips out of gear
- The chain catches and slides when in gear
- The chain comes off often
- There feels like a lag between when you pedal and when the wheel begins to turn
- There’s a noticeable amount of slack in the chain when you first begin to pedal
The most reliable way to figure out if your chain is stretched is to measure the chain. Further down I included a brief tutorial on how to measure your chain for wear – feel free to skip to that part if you already know your chain is worn.
How much do bike chains stretch
An average amount a chain can stretch before it is considered too stretched and needs replacing is when it has increased in length by 1%. This is the point where excessive wear starts to be put on the cassette.
The cassette is the large stack of rings that the chain wraps around at the base of the rear tire.
Every chain producer has specifications for their chains about how much a chain can lengthen before it should be replaced. You should consult some of their charts to be sure – but Shimano, SRAM or other chains will wear in a similar way and should be replaced at regular intervals (especially if you ride a lot).
How many miles should a bike chain last
A bike chain can last anywhere from 500 to 5,000 miles depending on the manufacturer and the riding style of the cyclist. The type of terrain and the cyclists’ strength also factors into the equation.
If a person is riding flat even terrain the chain will last a lot longer. Also the style of riding. If the person pushes off with a lot of force in higher gears from a stopped position it will put a lot of strain on the chain (due to the increased force).
When riding a bike, to prolong the chain you will want to ride as smoothly between gears as possible, to put the least amount of tension on the chain. This is not general knowledge among average cyclists.
This can be a limiting factor if you want to stand up and power up hills, which I do.
Different ways to test the amount of stretch in your chain
An easy method to give you a rough idea is to attempt to lift the chain away from the sprocket it is around. If there is quite a bit of space between the two then it is a good indication your chain will need replacing.
Method 1 – Chain Checker
What is a chain checker?
A chain checker is a simple device that measures the distance between links over a set length. It tells you whether the chain is in good condition or needs to be replaced.
For more detailed information on them, as these are the most reliable tools to check if your bike is stretched, check out the full article on what a chain checker is here.
There are two types of chain checkers and I’ll explain how to use both of them below (now might be a great time to mention that we have a fantastic review of the Pedro’s Chain Checker Plus you can check out):
Chain Checker Measure Pin Distance – (Park Tool CC 2.3 for Example)
This one is easier to use than the CC 2. A measurement is made whether the chain has stretched over 0.5% which is a typical length for a chain to be replaced. This does vary between the amount of gears, so more information about what exactly the readings mean will be explained below.
If a chain is not 0.5% stretched it is totally fine and doesn’t need to be replaced.
Some manufacturers will give different numbers for how far a chain can stretch before it should be replaced.
- Find the side of the tool that has the 0.5 stamp
- With the 0.5% stamp sign facing the chain, install the other end hard up against the empty space between a chain
- Attempt to fit the other end that has 0.5 on it in the open space it correlates to.
- If it doesn’t go in then it is not 0.5% worn
- Flip the tool over so that the 0.75% is facing the chain, do the same as the 0.5%
- If it doesn’t go in then it is not 0.75% worn.
| Stretch | Action |
| More than 0.75% | Replace immediately |
| once it reaches 0.75% | Replace |
| once it reaches 0.5% | 11+ Gears – Replace |
| once it reaches 1% | Bike with a single gear – Replace |
Chain Checker – Go-No-Go Gauge (Park Tool CC 2 For Example)
This is an earlier version of the chain checker which still works very well.
- Place the tool on top of your chain so that both ends are inserted into the space between the chain links.
- Using the dial push it gently to see if it will show 0.5%
- If it won’t show 0.5% when pushing gently then the chain is fine and won’t need to be replaced
- If the chain is 0.5% stretched, use the dial at 0.75% to check the upper limit.
Method 2 – A ruler.
Using a ruler will give you a rough idea but you’ll have to do the calculations manually.
- Pick a link to start from and line up the ruler with it.
- Count 23 more links along the chain
- The last rivet should be exactly 12 inches from the first chain
- If it is out by more than 1/16th an inch then the chain very likely needs to be replaced.
How do you fix a stretched bike chain (can you?)
It is far too difficult to fix a stretched bike chain, because a bike chain is made up of many small parts and it is hard to see which pieces need to be replaced and can be very tedious. Bike chains are also inexpensive so it makes more sense to purchase a new chain
How to replace bike chain on bike
There are two different types of bikes that have chains:
- Geared Bikes – A bike that has more than one gear, but typically 9-12 gears on the back tire are the most common on road, mountain or cyclocross bikes. Cruisers and hybrids will sometimes have 3-5 gears (or more).
- Single-speed bikes – No gears.
I will begin with the geared bikes as these are the most common:
Replacing a Chain on a Geared Bike
Tools Required:
- Master Link Pliers
- A Chain Tool
- Some lubricant
We will want to size our current chain to get the measurement for the new chain. The old chain has stretched 0.5%, so we are measuring how many links for the new chain, not the actual length.
The chain is stretched but it may also be the incorrect length when it was put on so we will first measure the old chain will work if we use it to measure the new one, if it doesn’t we’ll use another method to get the length.
Turn your bike upside down on a dry, clean surface.
- Put the bike in the highest gear
- When you do so it should go into gear easily.
- When looking at the derailleur it should have only 2 slight bends near the main center of the wheel. (images)
- Put the bike into the lowest gear
- There should be no slack in the chain.
If your chain passed the requirements above then you can use it to measure your new chain. If methods to measure how long a chain should be for each of the bike types is covered here[link]:
Remove the Chain:
There are two types of chains, master link chains, and connection river chains. The below only applies if you want to keep your chain.
Inspect a chain for a master link. If one is there then you will want to open it using the master link pliers.
If you don’t have a master link then look for a connecting rivet. These appear visually different from the other rivets. Use the chain tool to break a rivet but not one which is close to the connecting rivet.
The easiest way to do this is by removing the rear wheel.
Only do this step if you are reusing the chain. Most people replace their chain so simply use your chain tool to break the chain, and skip the above step.
Sizing the chain
You need to size your new chain because new chains always come longer than they need to be. You want to line up your old chain with the new chain but ensure that you are matching like for like. So that you are starting at the same place on both chains.
Now simply cut the new chain to match the same length as the old chain.
Putting the New Chain On
Visually inspect the new chain. Some chains have logos on the outside or directional indicators. Always point the logo outwards away from the deck. (image)
With masterlink chains you can start from either end.
With a connecting rivet chain ensure to start from the outer link.
As you feed the chain through the case watch out for any tabs and check it will work once the whole chain is connected. It is easy to let the chain go over when it should go under and vice versa.
Connecting the Chain Together
Again, there are two types of chains, master link and connecting river chains, so to connect the chain together for:
Master link chains
There are 2 methods for connecting a master link chain back together.
- Using masterlink pliers
- Look for any markings on the chain that indicate what direction the chain should go.
- Connect the master link and fit the master link pliers on it.
- Pull the pliers outwards to lock the master link
- Using the pedals and brake
Put the chain in the highest gear
- Look for any markings on the chain that indicate what direction the chain should go.
- Connect the master link
- Hold the rear brake on
- Pedal the wheel to lengthen the chain and the master link should clip into place
Connecting a Rivet Chain Together
A rivet chain has a special rivet that is longer than the other rivets and comes separately with the chain. Each special river is made specifically for a make and model of chain so ensure you have the correct one.
Apply a fair amount of lube to the special rivet.
Insert the connecting river into the empty hole in the chain, with the pilot tip facing outwards from the bike (going through and out to the side that the deck is on)
Using the chain tool push the rivet through.
A bit of force is required to initially get the rivet in, and to push it out the other side.
Push it in far enough so that the non-pilot tip side sticks out as much as the other rivets.
Remove the pilot tip using your chain tool.
Replacing a Chain on a Single Speed Bike
Tools Required:
- 12-inch adjustable wrench
- Ratcheting Click-type Torque wrench (not absolutely necessary but highly recommended)
- Needle nose pliers or master link pliers
- Chain tool
Remove the chain
The same instructions to remove a single speed bike are the same for the other bike types, to go to this info click here [link to removing a chain].
Measuring the chain
If your old chain can’t be used to measure the new chain then here are the steps to measure a new chain from scratch.
There are two types of dropouts, horizontal and forward facing. (image)
For horizontal dropouts move it as far forward as it can go, this makes the new chain easier to put on.
For forward facing dropouts do the same moving it as forward as it can go.
- Hold the wheel in at this position.
- Put the chain on
- have the top part of the chain end at about 45 degrees from the top, it should be a free end of the chain that starts at 45 degrees from the top of the pedal gear.
- Connect the two ends of the chain together. You want to ideally have them meet, and the inner link connecting to an outer link or vice versa.
- If two opposite links don’t match, add on a link we will adjust the length using the dropouts later.
- Add two more rivets onto the length, this will allow taking the chain on and off easier in the future.
For connecting the chain back together refer to the previous steps here, because the steps are the same for each type of gear system.
Chain tension
Adjusting the chain tension is a bit different on a single speed bike.
Before working with the chain make sure not to put your finger or hand on the inside of the chain, as it is very easy when testing the chain to roll your finger in between the gear and chain which really hurts.
Now test what the current tension of the chain is. We are looking for about 1 to 1.5 inches of movement vertically halfway between both ends of the chain.
If the tension is off, undo and redo the nut to move the rear wheel forward or back so that it is the required tension.
Some links might be a bit stiff and not move freely around the gears. Simply using your hands move the link around a little bit (don’t bend the links it out of shape) to loosen it up.
Final test for tension
- Put tension sideways on the chain and turn the pedal.
- You should hear a clicking sound coming from the rear gears.
- The chain should not derail.
- If it does it needs to be a bit tighter, adjust the chain but move the wheel again until the chain does not derail.
- Now, you’re ready to fully tighten the wheel to specifications.
- One final step if the bike has a coaster brake, then secure this.
Alternate Method for Geared Bikes
Tools Required:
- a tool to measure 8mm. An 8 mm Alan key works well.
- chain tool
- needle nose pliers
- Ratcheting Click-type Torque wrench (not absolutely necessary but highly recommended)
- 12-inch adjustable wrench or a wrench set.
Remove the chain
The same instructions to remove a single speed bike are the same for the other bike types, to go to this info click here.
Measuring the chain
To measure a new chain you can use your old chain, if it isn’t the right length, I will explain how to measure your chain without the old chain, so skip this step.
- To ensure we can use the old chain to measure the new chain we must first check it isn’t too stretched
- Shift to the largest sprocket on both ends of the gear.
- You should observe enough slack in the chain to see a slight bend on the two pulleys at the rear end of the bike.
- Now shift gears to the lowest gear on both ends.
- The lower part of the chain should have no slack in it.
- The bottom part of the chain should not touch the pulley and be at least 8mm to 15mm apart, depending on the manufacturer’s specifications.
Measuring the new chain and installing it from scratch without the old chain
- Begin by removing the old chain, if you haven’t already done this.
- Shift the gears to be the lowest possible on the front and back derailleur.
- Start with the end of the chain that has the outer plates on it.
- Feed this end through the rear derailleur
- Ensure it remains straight and is inside any feeder tabs which help keeping them aligned.
- If the chain doesn’t run smoothly through because some of the links are stiff, loosen then up a bit by hand without damaging it.
- Hold the free end and feed it around the front derailleur and hold it in the middle of the 3 and 6 o’clock positions.
- Pull the other end that you fed through the rear derailleur towards the other free end until the back derailleur pulleys are almost vertical.
- Loosen the bottom end two chain links at a time until the back pullers are horizontal again.
- When the pulleys are in the horizontal position there should be an 8mm to 15mm gap between the chain and the pulleys, measure it to see.
- Mark the link to cut with a marker, remove the chain and cut the chain using the chain tool.
- Connect the chain using the methods for the different chain types as shown here.
The guys at GCN do a great job of showing you how to replace a stretched, or worn out bike chain in this video: